Fluid Analysis 101: 5 Tips to Collect the Best Sample

Obtaining a truly representative fluid sample from your equipment or machine is the most critical part of a successful fluid analysis program. Without a true, accurate representation of what is going on inside your equipment, the analysis conducted may prove to be of little value in determining the condition of the machine at the time of sampling.
The particles and elements of wear, corrosion, fluid degradation and contamination provide the necessary diagnostic information concerning both the fluid and the machine. These particles can settle or separate out from the fluid, causing an uneven distribution throughout the system. So, choosing the right sampling point is very critical. Below are five tips to follow to ensure you collect the best sample possible.
- Take the sample from a point that provides plenty of turbulence in the fluid to ensure the particles are well mixed.
- If you’re sampling from a filtering device, samples should be taken upstream.
- For trending, it is best to take the sample from the same location, depth etc. on the equipment – every time.
- Where possible, take the sample while the equipment is in operation or within 30 minutes of shut-down.
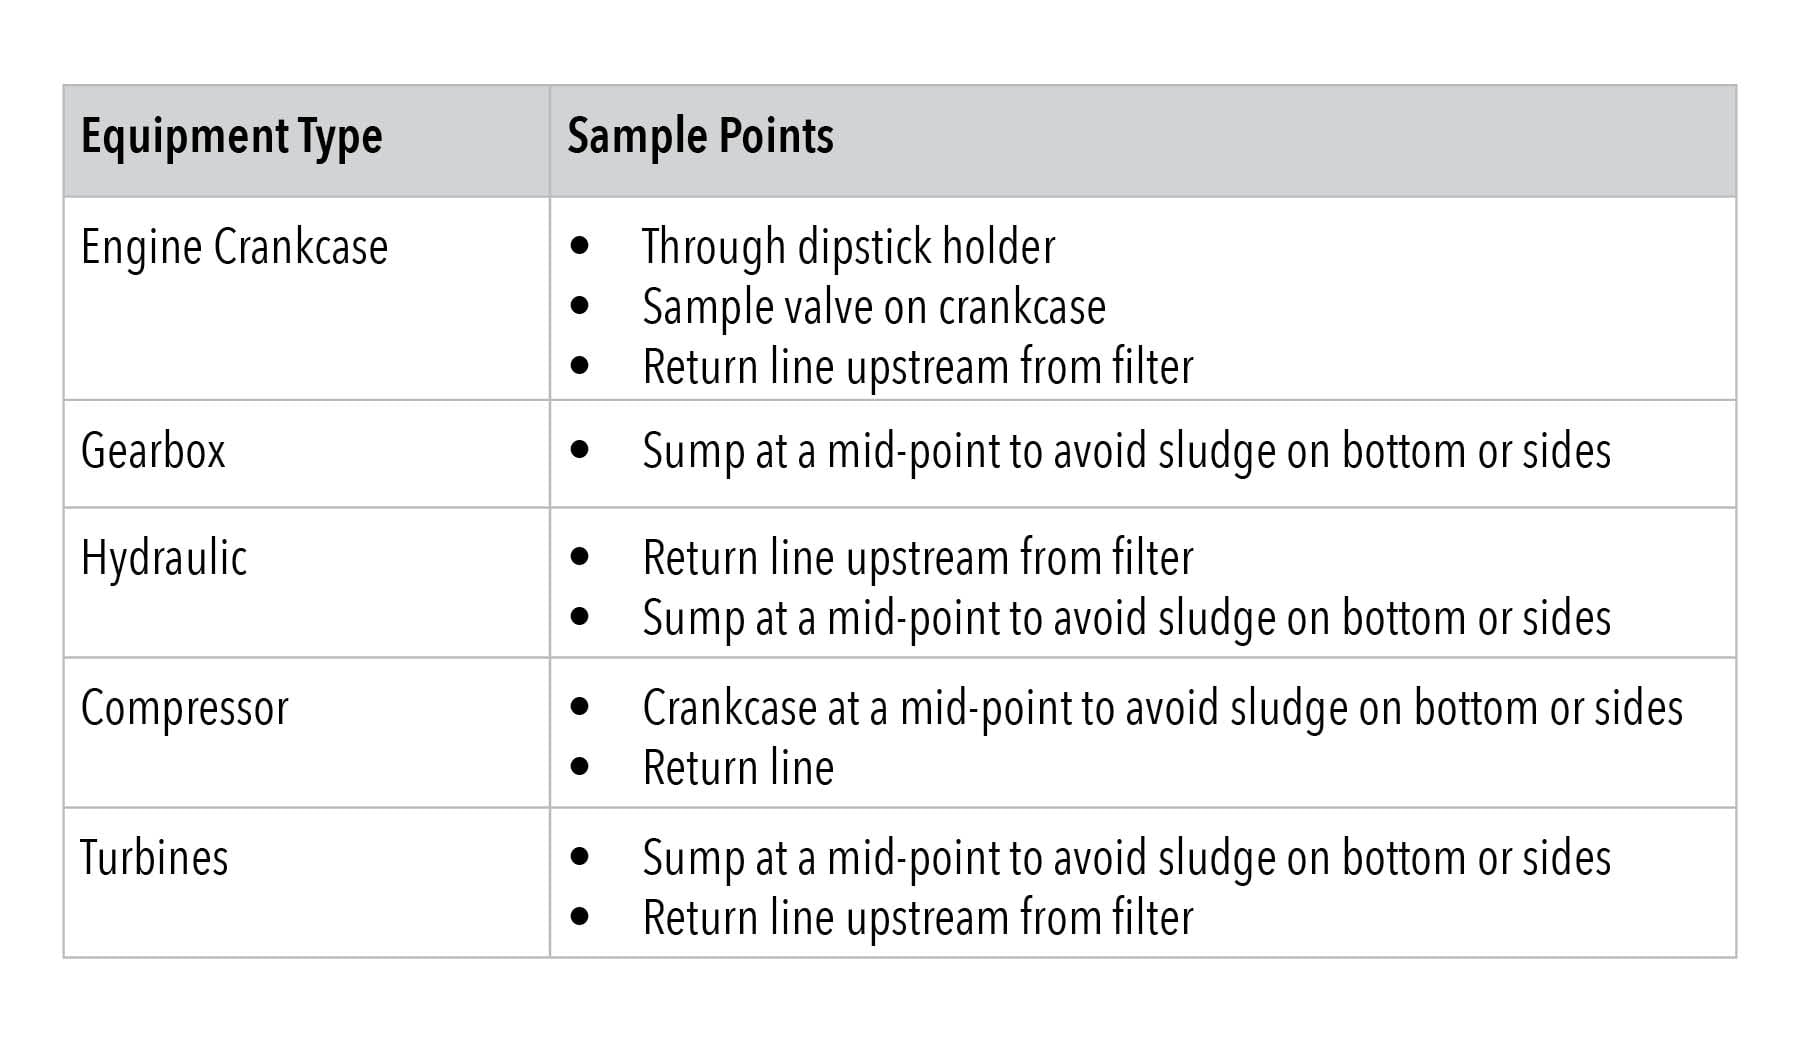
- The best sample points to collect the fluid are different depending on the type of equipment. The chart below outlines some of the best sample points:

To achieve a successful, effective fluid analysis program, the sample has to be truly representative of the equipment or fluid condition. This can only be accomplished if samples are taken from the same proper sampling points each time – this also helps to establish maintenance trends. To ensure you get the most value from your fluid analysis program – and to experience increased uptime and cost savings – follow these easy sampling tips.

Proven Impact. Proven Uptime. Proven Savings.
Let us prove it to you.


