Is Your Grease Headed to Failure?

Many maintenance technicians can tell you the health of their equipment just by the way it sounds and their maintenances and lubrication schedules. However, if you ask about their greased components, most say we grease it either on schedule or when it sounds like it needs it. Unfortunately both of those answers cannot tell you the health of those grease components. Your grease could be headed to failure without giving you any external indication.

Problems with a Grease Schedule

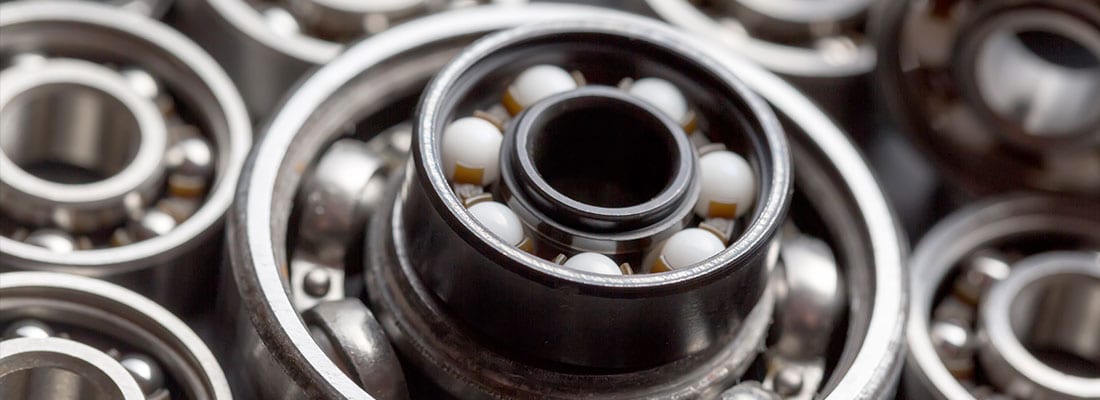
If you grease on a schedule, you could be greasing that unit too much and as you add that grease, you have to ask how much is too much. If you happen to be greasing too much, then you could be over lubricating your bearings which can cause the balls or rollers to slide along the race rather than turning. Then, the grease could actually churn. This churning mechanism could ultimately bleed the base oil from the grease. What will remain to lubricate the bearing is a thickened grease with little or no lubricating elements. Since there is not enough lubricating oil, and there’s excess heat from the churning, the grease would start to harden. The final outcome is bearing failure and equipment downtime.

Waiting to Re-Grease

On the flip-side, if you wait until it sounds like it needs grease before re-greasing, then you have already starved the component and the damage is already done. Putting grease in will only quiet it down but the final outcome is bearing failure and equipment downtime.

Prevent Failure and Downtime

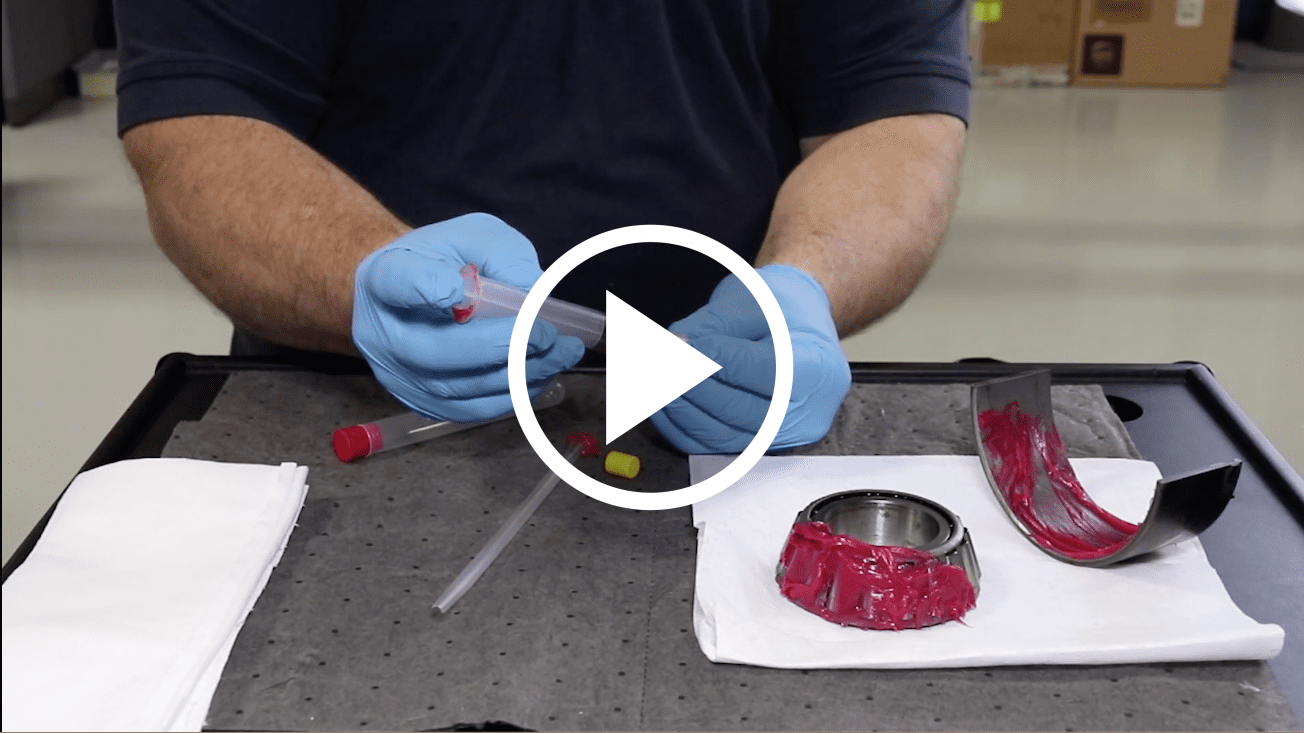
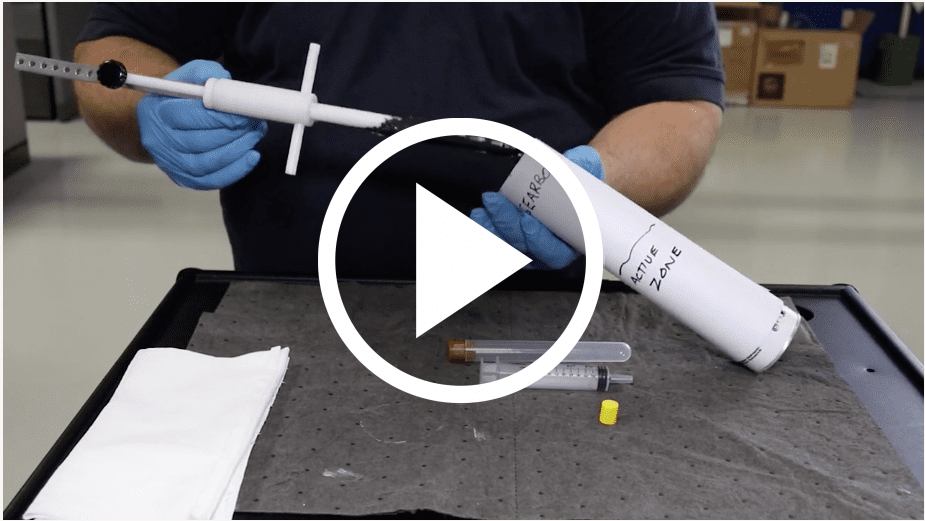
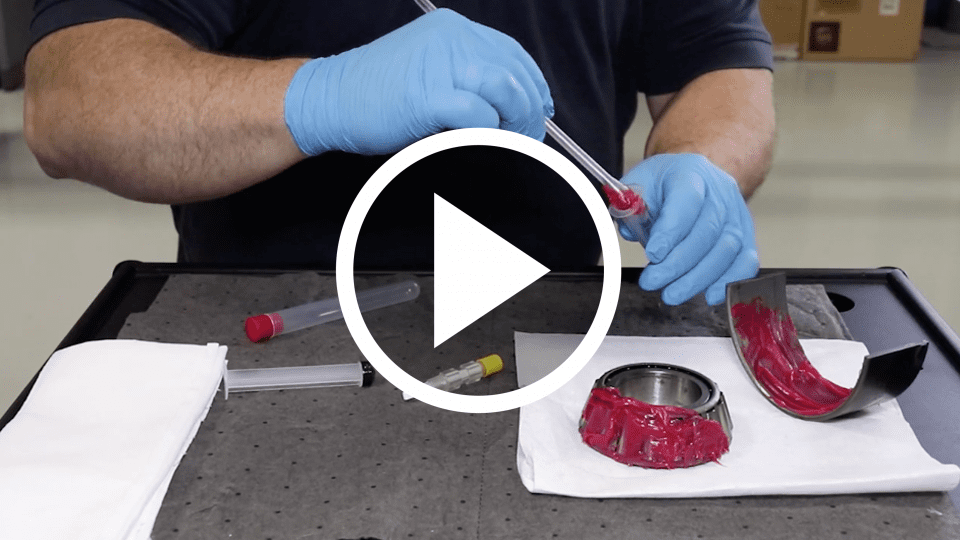
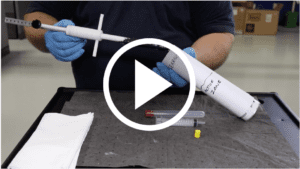
The proper way to prevent greased equipment failure is to monitor the component through regular grease analysis. By monitoring not only the wear but the grease properties, you can truly know how the grease is holding up. Under operation heat, load and external environmental influences can degrade the properties of the lubricant and its ability to provide lubrication of your greased equipment.

Learn more about our grease testing solution here.


Proven Impact. Proven Uptime. Proven Savings.
Let us prove it to you.

Published June 23, 2020

Tips for Pulling a Fluid Sample for Analysis

From oils to coolants, from coolants to grease – we all have our own methods for pulling a sample. But are you truly getting the best representative sample to send for testing? An accurate, representative sample will get you the most reliable sample results, so you can take the correct maintenance action. Want to learn more about best practices for pulling a sample?  See below for some tips:

Oil and Coolant Samples

There are several methods for pulling oil and coolant samples including a vacuum pump, probing valve and a pushbutton method.

  • Tips for using a Vacuum Pump Method
    • Use to pull samples from a dipstick or non-pressurized system
    • Pull a sample when equipment is at or close to normal operating temperature
    • Make sure the tubing is long enough to reach the middle of the reservoir tank
  • Tips for using a KST Series Probing Valve Method
    • Use with valves installed on a pressurized system with a minimum of 4 psi to a maximum of 1000 psi
    • Pull sample when equipment is at or near normal operating temperature
    • Wipe the valve clean with a dry and lint-free cloth
    • Flush at least 3 times into a “waste container” under the valve to purge stagnant oil and debris.
    • Fill the sample bottle bottle approximately 3/4 full
  • Tips for using a KP Pushbutton Sampling Valve Method
    • Use with valves installed on a pressurized line with a minimum of 4 psi to a maximum of 100 psi
    • Pull sample when equipment is at or near normal operating temperature
    • Remove protective valve cap and wipe opening with a dry and lint-free clean cloth
    • Flush at least 3 times into a separate container and then dispose of the waste oil
    • Fill the sample bottle bottle approximately 3/4 full

For full, step-by-step instructions for taking an oil sample or a coolant sample with these methods, view our technical bulletins or view our Fluid Analysis Sampling and Submission video.

Fluid Analysis Sampling and Submission

Grease Samples

There are two methods for collecting grease samples including a standard grease sampler device or a T-Handle.

  • Grease Sampler Method
    • Each kit comes with a plunger, syringe, spatula and grease sampler used collect your sample
    • Collect grease from the component and fill syringe
    • Use the syringe to fill the grease sampler
  • T-Handle Method
    • Use this method to collect a representative sample when a spatula can’t reach the active zone
    • Attach the grease sampler to the T-Handle tool
    • Measure the appropriate depth of the sample by inserting the locking knob into the proper hole
    • Fully insert the grease sampler and T-handle into the component until the tee contacts the housing face

For full, step-by-step instructions for taking a grease sample with a grease sampler or using the T-Handle tool, view our technical bulletins or view our demonstration videos below.

How to Take a Grease Sample with a Grease Sampler

How to Take a Grease Sample with a T-Handle

After collecting your sample, apply the bar code sticker to the sample bottle/container, submit your sample information online and ship the sample in to the laboratory nearest you for processing and testing.

Proven Impact. Proven Uptime. Proven Savings.
Let us prove it to you.

Published September 17, 2019

VIDEO: How to Take a Grease Sample

Grease analysis allows you to tap into new information about your equipment health and reliability. Taking action from the recommendations on your grease analysis sample report means you can:

  • Monitor consistency
  • Identify contamination, oxidation and wear concentration
  • Optimize your drain intervals

Each grease analysis sample kit includes the materials you need to take a grease sample and send it into the laboratory – including a spatula, plunger, syringe, grease sampler, shipping tube and envelope.

Grease Sampling: Easy as 1, 2, 3 … 4, 5
  1. Remove the plunger from the syringe.
  2. Use the narrow end of spatula to collect sample (~2 g) and fill the syringe with the grease.
  3. Use the syringe to fill the grease sampler.
  4. Place the cap on the grease sampler.
  5. Place the grease sampler into the provided shipping tube.

It’s that easy! Watch the video to learn how to take a grease sample from your equipment using our easy-to-use, cost-effective grease sampler.

How To Take a Grease Sample with a Grease Sampler

Click to watch

How To Take a Grease Sample with a T-Handle

Click to watch

Tips for taking a grease sample:

  • Send in a baseline reference sample
    • This allows us to compare results of used grease to the new grease
  • Fill the syringe with as much grease as possible
  • Collect your grease sample from the active zone in your equipment
Ready to learn more or start analyzing your grease?

Learn more about grease analysis, why it’s vital to a comprehensive fluid analysis program and what the tests identify by downloading our Grease Testing + Analysis FAQs.

Contact your account manager or submit our contact form to add grease testing to your fluid analysis program.

POLARIS Laboratories® Expands Testing Capabilities

It’s here: Grease Analysis!

We’ve officially expanded our suite of fluid testing and analysis capabilities to include grease – and you can start testing today. Grease analysis with POLARIS Laboratories® means:

  • Cost-effective condition monitoring
  • Eliminate unplanned, costly downtime
  • Optimize your grease intervals
  • Easy-to-use sampling devices – which need less than two grams of grease
  • Complete picture of your equipment’s reliability

View the complete press release here.

Learn more
POLARIS Laboratories® is hosting a free training webinar on July 30. Attend this webinar and learn more about grease testing and why you should add it to your program.

The Missing Link: Grease Testing & Analysis
Tuesday, July 30, 2019 | 11 a.m. ET

Contact your account manager or complete our Contact Us form to start testing your grease today!

Protect Your Investment, Protect Your Grease

Grease: a riddle, wrapped in a mystery, inside an enigma.

Most lubrication fundamentals are fairly well understood in this day and age. There are plenty of websites with documentation on topics ranging through a variety of lubricating systems and analysis. There are even a lot of manufacturers, laboratories and literature on the key points and fundamentals of the variety of other fluids used today, such as fuels, solvents and even coolants.

However, one area that is still shrouded in mystery to most: Grease.

Grease: A History

A semi-solid lubricant, grease generally it consists of a soap, emulsified with an oil, (though clays are used in place of the soap in some extreme temperature applications). Some of the first recorded applications were used by the Egyptians and the Romans, thousands of years ago, though modern greases really came about during World War II.

Manufacturing Complications

In the recent years, the manufacture of greases has been described as an art. The processes is very complicated and requires:

  • High temperatures and pressures
  • Oil charges added at specific times and flow
  • Accurate application – if not, the grease will fail and turn into slop

The tests designed to qualify the greases from the production environment were designed many decades ago and mainly designed to ensure quality during manufacturing. They were not designed to qualify greases, in the most part, for use in the field.

Grease Formulations

To make matters more complicated, most literature from OEM’s specify a NLGI grade, a soap type and if you are really lucky, a base oil viscosity requirement. Grease manufacturers have made a huge number of formulations and in many cases, these three parameters may be identical, yet the actual formulations could be significantly different and in fact incompatible with each other. Not all greases are compatible. Even greases of the same soap composition may be incompatible with each other, resulting in a complete loss of lubrication in the component.

Grease Sampling

The next issue is related to sampling. The process of lubrication utilized in a greased system is different compared to a similar oil-lubricated system. Grease is designed to release the lubricating oil charge with the soap holding it into the area where the lubrication is required. As a result, the grease in the compartment will most likely be extremely non-homogeneous. If the grease is sampled from the outer surface or from the corners of the system may not been representative of the grease next to the area being lubricated. Taking a representative sample that will provide a valuable maintenance recommendation is a really challenging activity. There are some excellent resources available to combat this issue, I suggest reading the ASTM D7718 Practice for Obtaining In-Service Samples of Lubricating Grease.

Grease Testing

The final step of conventional condition monitoring and equipment maintenance is normally testing of the fluid. As noted above, a number of conventional grease tests, are designed to qualify grease manufacture. These tests, such as penetration and dropping point, may not give any significant information for reliability purposes. This may seem of great concern to most, but in-service grease testing is an area where most current research is focuses on.

Why Test Your Grease?

Grease is rather complicated compared to conventional lubricating system’s condition monitoring systems. You might ask, why bother? Really, it comes down to cost. Grease is generally more expensive than the equivalent lubricant, sometimes by a factor of 10 or more. In addition, a large number of grease systems are designed to last a much longer periods between re-greasing compared to some conventional oil lubrication systems. As a result there is a real financial gain to be found from obtaining effective maintenance reliability recommendations.

POLARIS Laboratories® will be adding grease to our fluid analysis capabilities in the coming months. Stay tuned!

Proven Impact. Proven Uptime. Proven Savings.
Let us prove it to you. 

Published March 21, 2019