How to Prepare Your Program for 2022

After the events of 2020 throwing operations out of whack, we had high hopes for 2021. Unfortunately, the maintenance industry continued to struggle – whether it be labor shortages or lubricant shortages. But, we’re here to give you a little hope for 2022. We’re here to help you get your maintenance program ready for a new year.

Here are some tips to regain control of your maintenance program:

  1. Take an inventory of your equipment and conditions
  2. Identify or reassess the importance (criticality) of each equipment in your processes
  3. Dust off and review maintenance records of each individual piece of equipment
  4. Identify specific needs for each piece of equipment

If fluid analysis is one tool you use to assess equipment conditions, then consider these:

  1. Collaborate with your Technical Business Consultant | Identify specific actions/activities that will enhance the impact of a well-managed fluid analysis program (our team’s contact info is listed below)
  2. Audit your Equipment List | Complete any missing information and move inactive equipment to a mothball account
  3. Review Your Users | Assess your list of active users and add new or remove those that are no longer needed
  4. Determine Training Needs | Identify gaps and schedule appropriate sessions and topics
  5. Develop and Participate in a Program Review | Program reviews highlight areas where the program is being successful, as well as those needing improvement. Specific equipment in need of attention can be identified as well.

If you are ready to refocus your maintenance and fluid analysis, contact your POLARIS Laboratories® Technical Business Consultant for assistance in reviewing your maintenance practices so you can take your fluid analysis program to the next level.

POLARIS Laboratories® Technical Business Consultants:

Henry Neicamp

hneicamp@polarislabs.com

Connect with Henry on LinkedIn

Julio Acosta

jacosta@polarislabs.com

Connect with Julio on LinkedIn


Proven Impact. Proven Uptime. Proven Savings.
Let us prove it to you.

Published October 19, 2021

Why Accurate Sample Information is Important

Garbage In, Garbage Out

In this day and age, we have all encountered a situation where our personal data is not correct; it could be the bank has an old phone number or a store has a wrong or an old email address. POLARIS Laboratories® is no different when it comes to data – one area that hinders us and our laboratories is receiving accurate fluid information with your sample.

Why the Right Fluid Information is So Critical

It’s pretty simple really. If you send in a sample with incorrect fluid information, when we compare the test results from your sample to the information submitted, (the basis of a lot of the maintenance recommendations we make to you). If that information is correct, we are able to give you precise, actionable recommendations tailored to your application. If the information is incorrect, not only do the maintenance recommendations no longer hold as much value, but in some cases, we may recommend an incorrect action or repair.

To make matters worse, your test results may be delayed. For example, with the wrong fluid identified when submitted, we may send samples back to be retested in our laboratories to confirm, what looks like on paper, to be an incorrect result. This delays the results getting back to you. A more extreme example is submitting a used engine oil as an engine coolant, meaning the wrong test package may be applied, resulting in the sample going through the complete wrong testing thus missing issues you desperately need to be identified.

Blood Work as an Analogy

A good analogy for this would be getting getting blood taken at a doctor’s office. My blood, a middle-aged man, is submitted but the paperwork is mixed up. But because of the incorrect information, my blood is tested and the results compared to a 15 year old female – a very extreme case, but it could happen. My doctor gets the results back and then instructs me to go directly to hospital because my results say I’m in critical condition. The results from my blood are considered normal for a middle-aged male, but definitely abnormal for a 15-year old female.

Better Data = Better Predictions

It’s critical to a successful fluid analysis program that all applicable fields are filled in when submitting a sample. Testing in the laboratory is heavily dependent on the submission fields and directly affects whether or not a fluid receives the right laboratory testing and you recieve the right recommendations.

Proven Impact. Proven Uptime. Proven Savings.
Let us prove it to you.

Published August 11, 2021

How to Avoid On-Hold Samples

Having your fluid sample placed on hold creates a hold-up for our laboratory processing your sample, laboratory performing testing and in turn, a delay in providing you with the important results you need to take action. As your fluid analysis provider, we want to make sure we provide the most accurate results as possible by testing the right fluids for the right components for the right equipment and that the information is recorded in the right account.

Based on our internal research of on-hold samples, 1.72% of all fluid samples sent to our laboratories are placed on hold – this equates to more than 25,000 samples per year.

Reasons for On-Hold

Based on our research, 85% of fluid samples that are placed on hold are indicated as having seven different reasons. Here are the top 7 reasons a sample is placed on hold before it can be processed, tested and analyzed:

  1. Locked Account | We are unable to add your equipment to your account in our sample data system. This could be because of a request from your account owner.
  2. No Information | There is little to no account information for us to be able to identify the sample. This means there is incomplete, incorrect or missing information submitted.
  3. Prepaid Barcode Required | Your account is set up for prepaid sample barcodes, we received your sample without one of these barcodes and are unable to process your sample
    • Note: EZ Label barcodes are unique, single use only and can only be used one time. If you re-use a barcode, we can not process the sample.
  4. Unknown Account | There was no account information submitted with your sample.
  5. Missing Required Info | We are missing sample or component information that is required for your account.
  6. Incorrect Sample Form | Your fluid sample was received with a form that did not match the fluid type.
  7. Component Type | Your sample was submitted with no component type. To perform the correct fluid testing, we need the type of component your sample came from.
What if your sample is placed on hold?

We’ve put together an infographic outlining what you can do to resolve your on-hold sample so it can be placed in the laboratory queue for testing – and so you can get your results when you need them.

In addition, on your HORIZON® Dashboard, you can click on the blue link by ‘samples on hold’ to submit a resolution to address the on-hold issue. We will review your resolution and contact you if we need additional information.

Why is My Sample on Hold?

So, what can your team do to avoid your samples being placed on hold?
  • Ensure your account information in HORIZON® is correct with the owner of your account
  • Pay the correct amount of postage due (if you’re using a non pre-paid test kit)
  • Make sure both the account and component information are correct when registering your sample
  • Include all requested sample information at registration or on the paper sample information form
  • Only use sample label barcodes one time
  • Avoid paperwork errors – submit your samples through online sample submission in HORIZON

Proven Impact. Proven Uptime. Proven Savings.
Let us prove it to you.

Elemental Analysis Testing: Add it to Your Engine Coolant Report

Is Elemental Analysis Testing Included in Your Engine Coolant Report?

Do you get a physical every year? How about a routine blood test? Elemental Analysis is similar to having your blood drawn for a yearly physical. Just as the bloodwork will provide more details to your physician on how your body is functioning, the elemental analysis testing will provide more details on the equipment’s overall system health. If elemental analysis testing isn’t included in your routine fluid analysis, information regarding corrosion/wear, contamination and certain fluid properties will not be able to be monitored. Cooling system concerns are a leading factor to how well the equipment effectively can perform. Adding elemental analysis testing will identify corrosion, mechanical issues, contamination and other possible fluid properties in the sample.

With majority of engine failures traced back to cooling system, predominantly due to overheating events, proper coolant analysis testing should be performed on all samples. When proper testing is not included, the missing information will hinder the laboratory’s maintenance recommendations as the possible root cause for concerns may not be identified. Ultimately, not identifying the root cause will lead to higher downtimes and engine failures.

How to Add Elemental Analysis

Reach out today to review if your fluid analysis program includes the proper testing that will best benefit your program. Including elemental analysis testing within your program will help identify if concerns are present in the cooling system. When specific issues are identified correction can be performed to reduce further potential damage to the equipment. Elemental analysis testing should be included on all samples submitted to the laboratory as this testing will provide critical information regarding the equipment’s overall system health. Catching early system concerns and performing proper corrections will assist with maintaining proper cooling system function reducing unexpected downtimes and engine failures.

Check out our Technical Bulletin to find out more information on the Benefits of Elemental Analysis Testing on Engine Coolants. 

Download the Technical Bulletin

Proven Impact. Proven Uptime. Proven Savings.
Let us prove it to you.

Published October 8, 2020

Do You Have the Right Coolant Testing?

Providing a Greater Understanding

Do you have an extended life coolant? Did you know that mechanical and/or contamination can occur causing the extended life coolant properties to decrease and reduce the life of the fluid? Have you ever had an unknown coolant formulation in the cooling system and a coolant top off was needed? Including High Pressure Liquid Chromatography (HPLC) testing to your program will provide the additional information to assist with providing a greater understanding of your fluid properties. When HPLC testing is included in your coolant test package, additional coolant inhibitors that may be in the coolant formulation will be monitored. Results for the inhibitors will be reported in parts per million.

What is High Pressure Liquid Chromatography (HPLC) Testing?

HPLC testing will report two different inhibitor types:

  1. Carboxylic organic acids
    • These acids will be utilized in extended life coolant formulations and hybrid formulations. The inhibitors will provide corrosion protection of the metals in the cooling system. The corrosion protection inhibitors needed for your application and formulation must be maintained and adequate to protect your cooling system.
    • There are a lot of different organic acids that may be used in the coolant formulation. Understanding the coolant formulation is a key factor in maintaining the coolant appropriately.
    • Carboxylic organic acids our method reports:
      • Benzoic Acid
      • Sebacic Acid
      • 2-Ethylhexanoic Acid
      • Octanoic Acid
      • P-Toluic Acid
      • Adipic Acid
      • 4-Tert-Butylbenzoic Acid
  2. Azoles
    • Azoles may be utilized in any coolant formulation on the market. Azole inhibitors are for copper and brass protection in the coolant formulation.
    • Azoles our method reports:
      • Benzotriazole (BZT)
      • Tolytriazole (TTZ)
      • Mercaptobenzothiazole (MBT)

HPLC Compared To Test Strip

HPLC testing will provide more insight of the type of inhibitors in the coolant formulation compared to a pass/fail carboxylic acid test strip. Test strips are subjective as a color determination is usually the indicator for the result. Test strips will only work for certain coolant formulations determined by what the test strip is looking for. Whereas HPLC testing can be performed on any coolant formulation and report each of the organic acids and azoles the method is able to report in ppm. The HPLC testing will indicate concerns of mixing coolant formulations when compared to a baseline. HPLC testing will also help determine if carboxylic organic acids and azoles are utilized in the coolant formulation or not. A test strip will not be able to provide this information and may or may not be applicable for the coolant formulation providing an inaccurate result making more difficult to maintain your fluid appropriately.

Reach out today! Add High Pressure Liquid Chromatography testing to your program.

Including HPLC testing to your program will provide testing to determine if organic acids and azole inhibitors, utilized in some coolant formulations, are being maintained for proper protection.
HPLC testing will provide more insight on how to maintain the coolant formulation and will determine if concerns are present impacting your corrosion protection inhibitors. Catching concerns early and making corrections will lower corrosion concerns and even possible cooling system issues that could have led to engine problems.

Check out our Technical Bulletin to find out more information on how High Pressure Liquid Chromatography (HPLC) Testing works:

Download

Proven Impact. Proven Uptime. Proven Savings.
Let us prove it to you.

Published September 8, 2020

Ion Chromatography Testing Can Catch Cooling System Concerns Early

Have you received a recurring action on your coolant analysis report? Are you noticing recurring concerns with your pH, corrosion metals, and/or inhibitor depleting rapidly? Have you ever topped off the system with water only?

With basic coolant testing a piece of the puzzle to help identify the root cause of the concern in the cooling system may be missing. Basic testing will identify concerns and provide recommendations however, there may still be more going on in the system that basic testing will not identify.

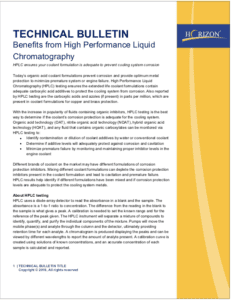
Why Should Advanced Ion Chromatography (IC) Coolant Testing Be Added?

The advanced Ion Chromatography (IC) testing will determine glycol degradation, contamination and coolant inhibitors of nitrate, nitrite and possibly phosphate. IC testing will provide additional valuable information regarding your cooling system health.

IC testing will help find concerns with:

  • Hot spots (plugging of the system)
  • Combustion gas leaks
  • Electrical ground issues
  • Contamination concerns

Each concern above will cause a chemical reaction within the cooling system, resulting in failure overtime. Approximately 40% of engine failures can be traced back to a concern in the cooling system. Including IC testing to your routine coolant analysis program will provide more information on what is going on in the cooling system. Concerns can be caught early allowing for scheduled down time and less engine failures due to the cooling system.

What are Glycol Degradation Acids?

Degradation acids will form when ethylene or propylene glycol chemically breakdown. When degradation acids are present further glycol breakdown will occur as the acids present will act similar to a catalyst causing further glycol degradation over time.

Causes for degradation acids:

  • Localized overheating
  • Restriction of coolant circulation
  • Low coolant pressure
  • Mechanical concerns
  • Age of fluid

Degradation acids will hinder the coolant properties over time and may result in a decrease of the coolants ability to protect the metals in the system. Identifying the root cause is key to maintain the fluid and equipment. 

What Contamination Concerns can be Found?

Ion Chromatography will indicate contamination of chloride and sulfate. Chloride and sulfate are a concern if present in the system. Chloride can form hydrochloric acid, decarbonizes iron and is extremely corrosive. Sulfate can form sulfuric acid and combined with calcium to form scale in the system.

Causes for contamination:

  • Water source not meeting specification
  • Combustion gases
  • Air leak
  • Flush water left in system

Sulfate, when trending with prior history, can find an early combustion gas leak concern in the cooling system before an action is indicated on your lubricant analysis report. The coolant analysis will actually catch the concern and action can be made before a significant amount of coolant can mix with the lubricant leading to further engine wear.

Chloride contamination could be due to a venting concern allowing outside air to enter the system. Both chloride and sulfate can be present in a water that does not meet specification. Just a quick top off with water can cause a failure over time.

Catching contamination early with Ion Chromatography testing will provide the proper actions needed to correct the source of contamination before corrosion and/or chemical reactions occur harming the metals in the engine.

Are there benefits of reporting Nitrite and Nitrate?

Nitrite and nitrate may or may not be part of the coolant formulation as a corrosion inhibitor. The Ion Chromatography method is a more accurate method to determine nitrite concentration. The inhibitor if present, should be maintained for proper corrosion protection. Results can find concerns of low inhibitor, or mixing if inhibitor levels are not consistent with a new fluid reference. Trending both inhibitor levels can detect early concerns of chemical reactions, such as an electrical ground issue where nitrite could convert to nitrate.

Reach out today! Add Ion Chromatography testing to your program.

Advanced coolant testing will provide more details of possible chemical reactions occurring in your equipment and/or finding the root concern of recurring high severities found during basic coolant testing. Trending results from IC will provide more information on the fluid and find possible mechanical concerns in the cooling system. Catching system concerns early will help keep the cooling system functioning correctly and reduce unscheduled down times increasing your return of investment.

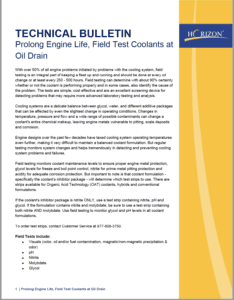
Check out our Technical Bulletin to find out more information on how Ion Chromatography (IC) Testing works:
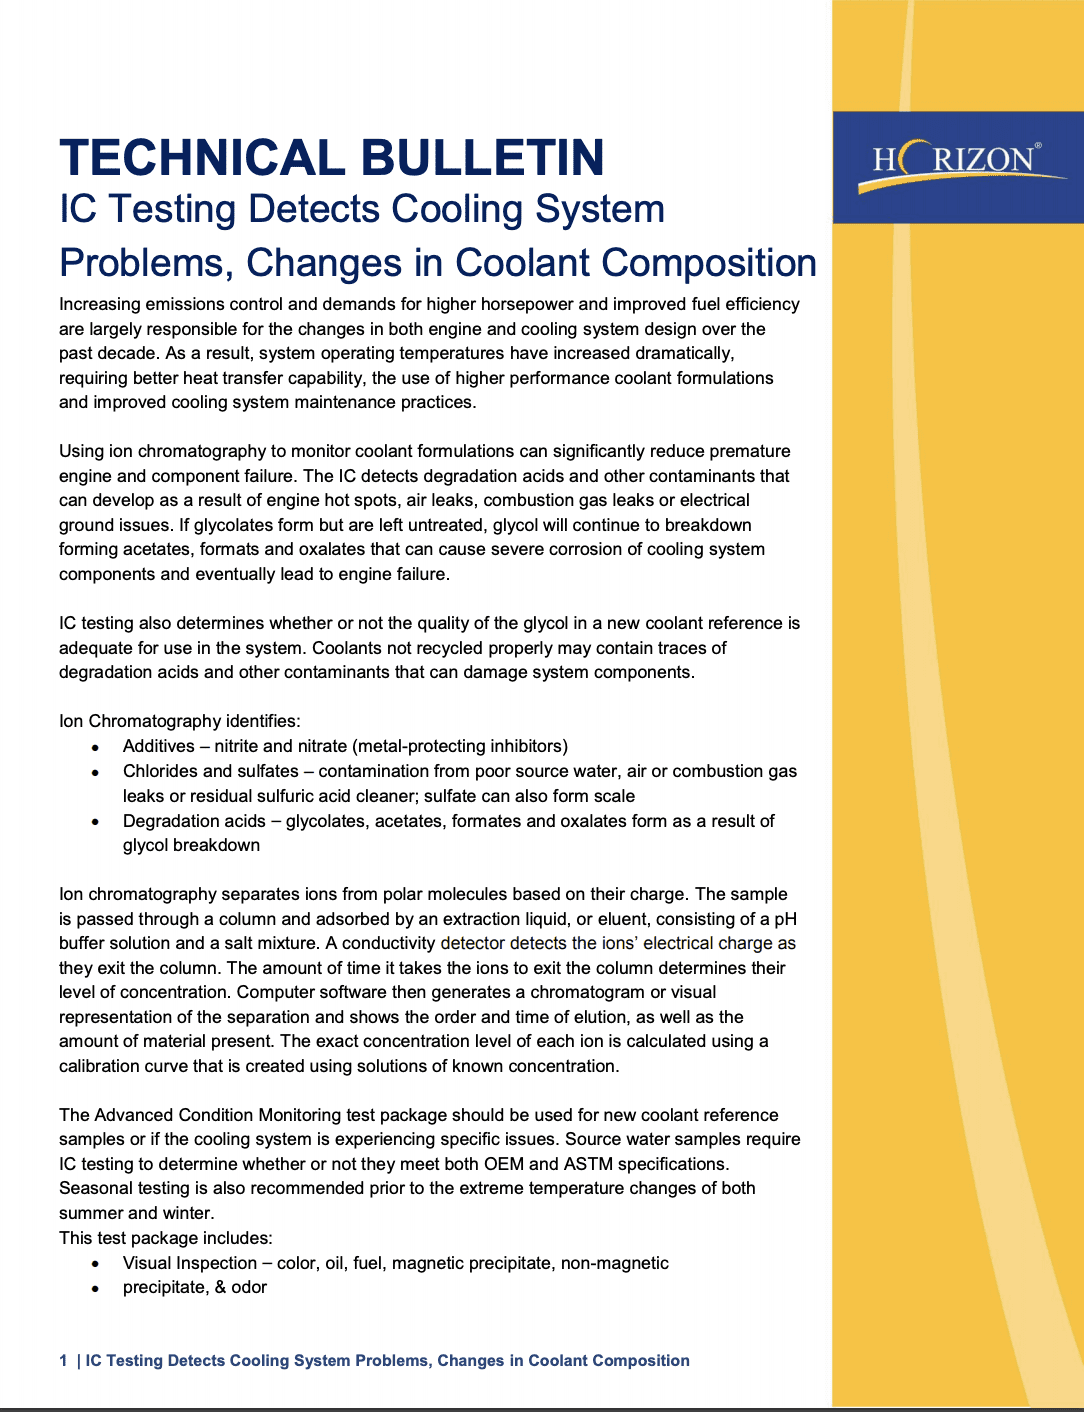
Click to Download

Proven Impact. Proven Uptime. Proven Savings.
Let us prove it to you.

Published August 26, 2020

What To Do if You Have a Coolant Leak

So, you’ve received your oil analysis report back recommending an inspection of the cooling system. (You may or may not also find an oily sheen in the cooling system.) When a lubricant report is received indicating coolant contamination, the root cause of the problem must be found and corrected.

Are you only looking at half of the data?

An internal leak will require further maintenance to be performed to correct the internal contamination, such as a possible new engine rebuild. Have you determined the root cause for the internal leak? Internal leaks are not just something that will be expected to occur at some point in your equipment life expectancy. The same could be said for concerns with your lubricant analysis report indicating higher oxidation values and not being able to optimize the lubricant drain interval. Identifying and reacting to the lubricant analysis recommendations may not always identify the root cause when only testing the oil.

Why would an internal leak or shorter drain intervals occur?

One possible reason is from overheating. Overheating will put more stress on both the lubricant and the coolant and increase acid build up to occur, causing corrosion to the metal surfaces of the engine eventually leading to soft spots. The overheating may not be found on your dashboard but the internal temperatures in the engine may still be elevated. The higher temperatures will cause stress to the lubricant resulting in oxidation and acid build up which ends up thickening the oil. At this point the oil cannot provide the adequate lubricant regime necessary to help protect the engine from wear. Having metal to metal contact will not only increase the engines internal operating temperature, it will also cause soft spots to occur causing cracks and coolant to leak into the engine. As a result this can lead to engine failures, unexpected downtime, maintenance and repair costs.

Are you regularly testing the cooling system within your equipment?

OEMs have indicated approximately 40%, if not higher, of preventable premature engine failures can be traced back to problems in the cooling system. Concerns in the cooling system may be present without a visible indicator and cooling system failures are less common. This is one reason some may not think to test their coolant. However, understanding how the cooling system functions and how the fluid properties can impact the cooling system is a critical component to the overall engine performance.

The purpose of your cooling system is to:

  1. Circulate the coolant throughout the system
  2. Remove heat from the engine
  3. Dissipate heat from the coolant

The cooling system concerns that are not corrected early will hinder the performance of the engine and eventually lead to a premature engine failure. Adding coolant testing to your fluid analysis program will help aid in catching coolant related issues and/or determine if concerns are present due to out of date maintenance procedures. Routine testing of the cooling system will provide recommendations and correction needed to maintain the cooling system and fluid properties. If concerns are not corrected or monitored then internal leaks and/or shorten lubricant drains may occur causing increased wear and damage to your equipment.

Test all fluids in your equipment

Testing all fluids within the equipment by utilizing an effective fluid analysis program will help reduce unexpected down times and/or equipment replacements – resulting in an increase return of investment (ROI). Reach out today to discuss how improve your overall fluid analysis program by testing all components in your equipment.

Proven Impact. Proven Uptime. Proven Savings.
Let us prove it to you.

Published July 21, 2020

Appearance May Not Tell the Whole Story


Appearances can be deceiving! During every PM you need to be monitoring your cooling system.

Your coolant should be clear of precipitate and have the appearance of new fluid when first put into the system. However, only monitoring the appearance may not tell the whole story of the health of the cooling system. Appearance can indicate some concerns when an odor or clarity change occur. However, with further testing performed at regular PM intervals, in conjunction with laboratory testing to monitor the health of the cooling system, concerns can be caught earlier rather than just monitoring the appearance.

Some early system concerns that will not be visible by just looking at your coolant:

  • Corrosion
  • Hard water contamination
  • Chemical reaction impacting pH levels
  • Inhibitor levels
  • Degradation due to overheating
  • Glycol concentration for adequate freeze point and boil point control

One of these coolant samples caused a $500,000 replacement on the equipment. Can you tell which one?

Utilizing proper testing to monitor the cooling system and fluid health are very important for maintaining your equipment.

The cooling system is critical to maintaining proper temperature for the equipment. Approximately 40 to 50 percent of preventable engine failures can be traced back to problems in the cooling system. Of those failures due to the cooling system, 80 percent of the concerns can be identified and corrected early before attributing to engine concerns leading to an unnecessary failure. Proper testing will detect problems that are not visible to the naked eye and determine if the cooling system is able to protect your equipment and prevent unexpected equipment down time and increase maintenance costs.

Learn more about the importance of field testing coolants at every PM


Proven Impact. Proven Uptime. Proven Savings.
Let us prove it to you.

Published March 11, 2020

Why Too Much Coolant Corrosion Inhibitor Can Be Harmful

What are coolant corrosion inhibitors?

Coolant corrosion inhibitors help decrease the corrosion rate of metals within your equipment and help maintain other coolant properties. The coolant manufacturers will determine the type of coolant corrosion inhibitors utilized in their product. The main types of inhibitors are:

  • Inorganic based (IAT)
  • Organic based (OAT)
  • Azoles

What coolant should I use?

The coolant you use while maintaining your equipment should utilize the same type of inhibitors as the coolant formulation that’s already in your system.

Here are some ways to make sure your fluid is able to properly protect your equipment:

  • Testing with test strips (see technical bulletin below)
  • Using fluid analysis laboratories
  • Following recommendations on how to maintain inhibitor for the specified fluid type

We know low corrosion inhibitors for heavy duty applications leave our equipment vulnerable to corrosion but, why is too much a problem?

Even though heavy duty equipment will require a higher level of inhibitors compared to light duty equipment, a specific range must be maintained for proper protection. Adding too much coolant corrosion inhibitor to the cooling system, no matter what type of inhibitors are utilized in the fluid, will impact other coolant properties. The pH and specific conductance will increase which will lead to corrosion concerns.

Another concern is the coolant’s saturation point. When the saturation point (where no more inhibitor can be absorbed in the coolant) is reached, the inhibitors will drop out and a precipitate will form. The precipitation will cause plugging of the coolant passage ways.

When this occurs the coolant will no longer be able to prevent corrosion of the metals that come in contact with the coolant.

What a coolant corrosion inhibitor drop out means

A major function of the cooling system will be impacted due to the drop out of coolant corrosion inhibitors. This important function is coolant flow. When the coolant cannot effectively circulate through the engine due to precipitation restricting coolant flow we lose our capability for heat transfer. Without proper heat transfer we will experience engine overheating and may cause further engine damage. Both scenarios of too little or too much coolant corrosion inhibitor will negatively impact your equipment and overall decrease your equipment’s reliability. Maintaining the correct coolant corrosion inhibitors in the recommended ranges per coolant manufacturer recommendations will provide the best protection for your equipment.

Below are some technical bulletins with additional information on coolants, coolant test strips and high performance liquid chromatography (HPLC).

Coolant and Cooling System Maintenance

Coolant Test Strips

Benefits from High Performance Liquid Chromatography (HPLC)

Proven Impact. Proven Uptime. Proven Savings.
Let us prove it to you.

Published October 8, 2019

Tips for Pulling a Fluid Sample for Analysis

From oils to coolants, from coolants to grease – we all have our own methods for pulling a sample. But are you truly getting the best representative sample to send for testing? An accurate, representative sample will get you the most reliable sample results, so you can take the correct maintenance action. Want to learn more about best practices for pulling a sample?  See below for some tips:

Oil and Coolant Samples

There are several methods for pulling oil and coolant samples including a vacuum pump, probing valve and a pushbutton method.

  • Tips for using a Vacuum Pump Method
    • Use to pull samples from a dipstick or non-pressurized system
    • Pull a sample when equipment is at or close to normal operating temperature
    • Make sure the tubing is long enough to reach the middle of the reservoir tank
  • Tips for using a KST Series Probing Valve Method
    • Use with valves installed on a pressurized system with a minimum of 4 psi to a maximum of 1000 psi
    • Pull sample when equipment is at or near normal operating temperature
    • Wipe the valve clean with a dry and lint-free cloth
    • Flush at least 3 times into a “waste container” under the valve to purge stagnant oil and debris.
    • Fill the sample bottle bottle approximately 3/4 full
  • Tips for using a KP Pushbutton Sampling Valve Method
    • Use with valves installed on a pressurized line with a minimum of 4 psi to a maximum of 100 psi
    • Pull sample when equipment is at or near normal operating temperature
    • Remove protective valve cap and wipe opening with a dry and lint-free clean cloth
    • Flush at least 3 times into a separate container and then dispose of the waste oil
    • Fill the sample bottle bottle approximately 3/4 full

For full, step-by-step instructions for taking an oil sample or a coolant sample with these methods, view our technical bulletins or view our Fluid Analysis Sampling and Submission video.

Fluid Analysis Sampling and Submission

Grease Samples

There are two methods for collecting grease samples including a standard grease sampler device or a T-Handle.

  • Grease Sampler Method
    • Each kit comes with a plunger, syringe, spatula and grease sampler used collect your sample
    • Collect grease from the component and fill syringe
    • Use the syringe to fill the grease sampler
  • T-Handle Method
    • Use this method to collect a representative sample when a spatula can’t reach the active zone
    • Attach the grease sampler to the T-Handle tool
    • Measure the appropriate depth of the sample by inserting the locking knob into the proper hole
    • Fully insert the grease sampler and T-handle into the component until the tee contacts the housing face

For full, step-by-step instructions for taking a grease sample with a grease sampler or using the T-Handle tool, view our technical bulletins or view our demonstration videos below.

How to Take a Grease Sample with a Grease Sampler

How to Take a Grease Sample with a T-Handle

After collecting your sample, apply the bar code sticker to the sample bottle/container, submit your sample information online and ship the sample in to the laboratory nearest you for processing and testing.

Proven Impact. Proven Uptime. Proven Savings.
Let us prove it to you.

Published September 17, 2019